
- Prep time: 1 hour 10 minutes + 22 hours for proofing
- Cook time: 40 minutes + 1 hour for cooling
- Serves: one loaf, about 900g
- Difficulty: medium
- Course: baking
- Cookware: proofing basket, baking pot, KitchenAid food processor
- Cuisine: European
Ingredients
- 105 g “ripe” stiff wheat sourdough starter
- 475 g strong bread flour
- 50 g all purpose flour
- 400 g water
- 2 tsp salt
Cooking method
STEP 1
Mix flour and water in a large bowl. Knead the dough quickly with your hands or using a mixer just to combine. Cover the bowl and let the dough rest at a room temperature for 2 hours for dough autolysis.
STEP 2
Add the sourdough starter to a bowl and knead the dough until the sourdough starter is completely mixed. Cover with foil and leave for 45 minutes for dough fermentolize. Then add salt and knead the dough with a mixer for 5 minutes or by hand until the salt is completely mixed. Cover the bowl and let the dough rest at room temperature for 45 minutes.
STEP 3
Sprinkle the work surface with water and transfer the dough to the surface. Stretch it carefully as far as possible with wet hands. This process is called lamination. Fold the dough into a tight envelope. Transfer the “envelope” to a container greased with vegetable oil, cover with foil and leave for 1 hour.
STEP 4
Make “stretch and fold”. With wet fingertips, grab a portion of the dough and stretch it upward. Then fold the dough over toward the center of the bowl. Give the bowl a one-quarter turn and repeat: stretch the dough upward and fold it over toward the center of the bowl. Repeat again twice after each hour. After third folding let the dough rest for 2 hours.
STEP 5
Slowly pour the dough onto a working surface dusted with flour. Let it rest for a few minutes. Then give it the form you need and put it into a proofing basket, well dusted with flour. Cover, let it stand at room temperature for 15 minutes and then place it in the refrigerator for 10-12 hours to retard.
STEP 6
Preheated the oven and pot with a lid to 250C. Last steps are the following: carefully pour the dough to a list of parchment, cut the surface of the loaf with a razor, transfer it with the paper to a hot baking pot, close the lid and bake the bread for 20 minutes at 240C. Then uncover the pot and bake for 20 minutes at 220C. Remove the finished bread from the pot and transfer to a rack to cool.
My tips and tricks:
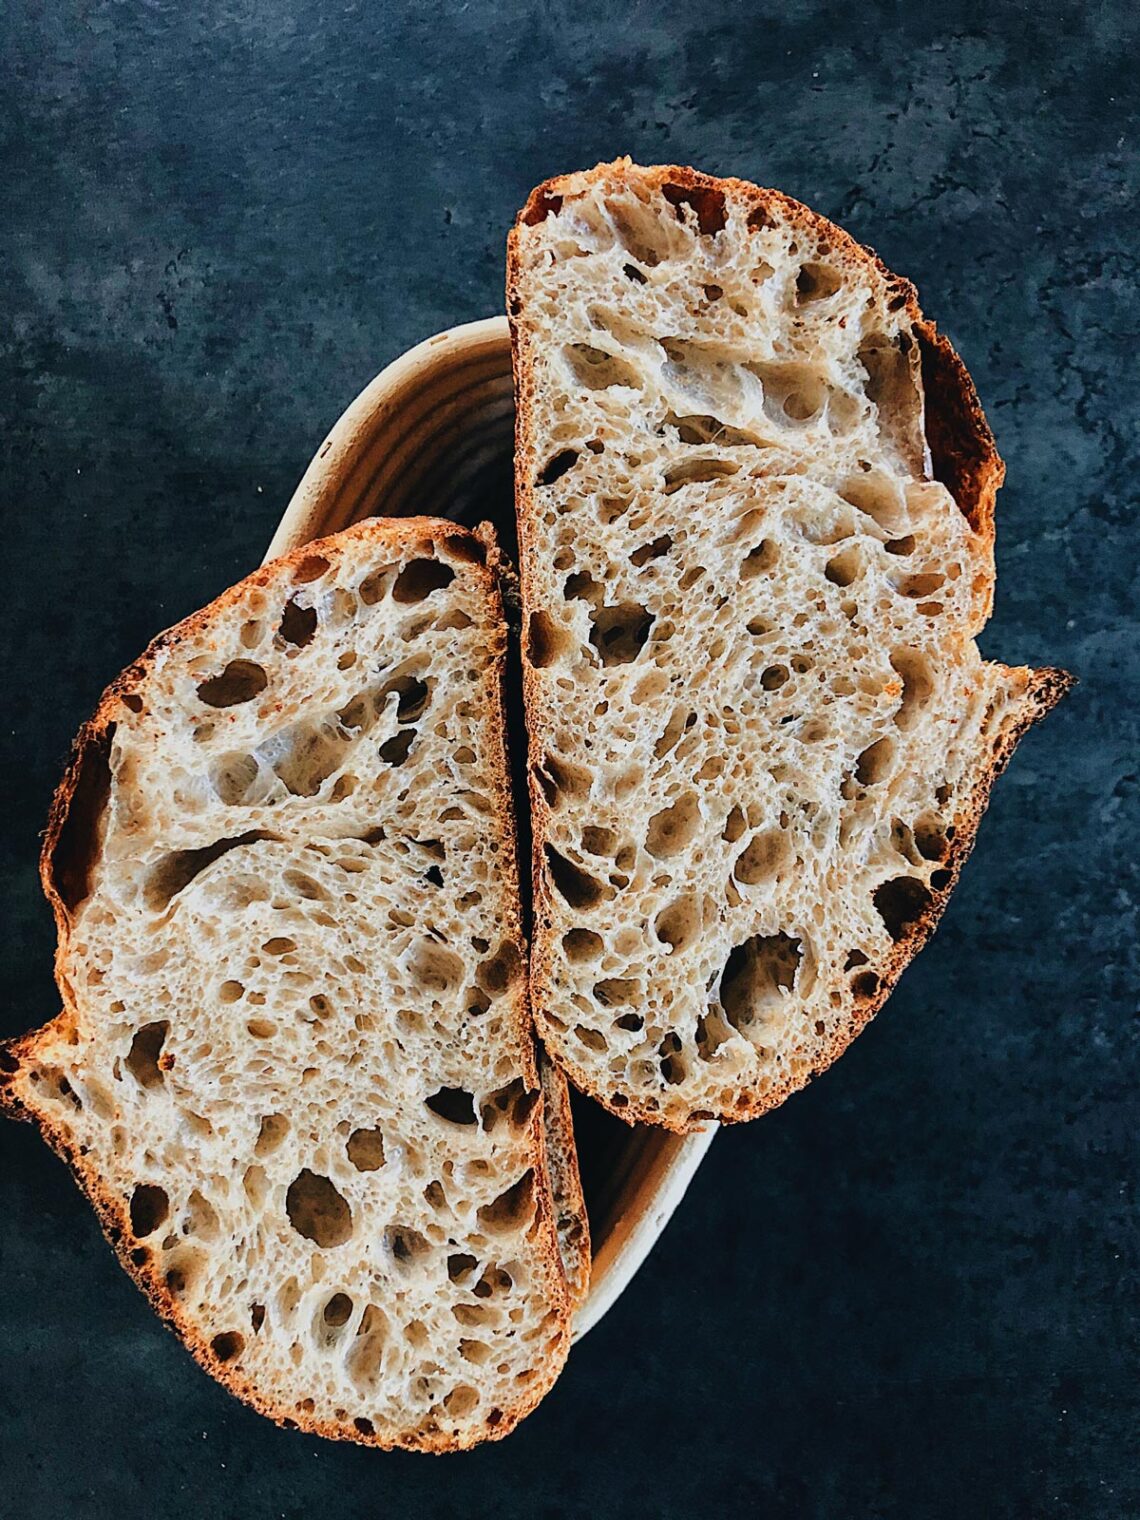
Do you want to blow up Instagram with a nice slice of bread with big holes? Then pay special attention to the sourdough starter – for this recipe it must be “ripe”, so feed it several times before working with it and use it in its “peak” state, when it has grown and beautiful cap has formed on top. Carefully work with the dough to keep air bubbles in it and don’t forget to get it to the cold proofer – this helps to get an open crumb a lot. You don’t have a baking pot, you can use a bread stone. If doing so, don’t forget to add some steam at the beginning of the baking, so pour a cup of hot water on a tray placed on the bottom of the oven. The bread is really incomparable, hundreds of likes are guaranteed to you!

- 105 g "ripe" stiff wheat sourdough starter
- 475 g strong bread flour
- 50 g all purpose flour
- 400 g water
- 2 tsp salt
- Mix flour and water in a large bowl. Knead the dough quickly with your hands or using a mixer just to combine. Cover the bowl and let the dough rest at a room temperature for 2 hours for dough autolysis.
- Add the sourdough starter to a bowl and knead the dough until the sourdough starter is completely mixed. Cover with foil and leave for 45 minutes for dough fermentolize. Then add salt and knead the dough with a mixer for 5 minutes or by hand until the salt is completely mixed. Cover the bowl and let the dough rest at room temperature for 45 minutes.
- Sprinkle the work surface with water and transfer the dough to the surface. Stretch it carefully as far as possible with wet hands. This process is called lamination. Fold the dough into a tight envelope. Transfer the "envelope" to a container greased with vegetable oil, cover with foil and leave for 1 hour.
- Make “stretch and fold”. With wet fingertips, grab a portion of the dough and stretch it upward. Then fold the dough over toward the center of the bowl. Give the bowl a one-quarter turn and repeat: stretch the dough upward and fold it over toward the center of the bowl. Repeat again twice after each hour. After third folding let the dough rest for 2 hours.
- Slowly pour the dough onto a working surface dusted with flour. Let it rest for a few minutes. Then give it the form you need and put it into a proofing basket, well dusted with flour. Cover, let it stand at room temperature for 15 minutes and then place it in the refrigerator for 10-12 hours to retard.
- Preheated the oven and pot with a lid to 250C. Last steps are the following: carefully pour the dough to a list of parchment, cut the surface of the loaf with a razor, transfer it with the paper to a hot baking pot, close the lid and bake the bread for 20 minutes at 240C. Then uncover the pot and bake for 20 minutes at 220C. Remove the finished bread from the pot and transfer to a rack to cool.